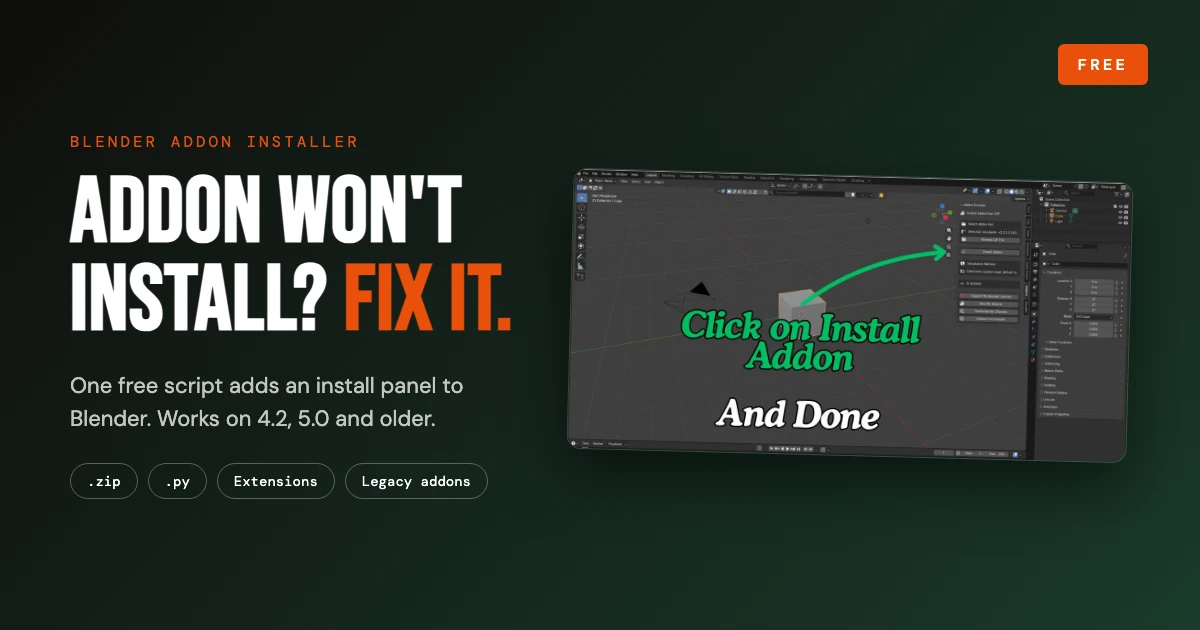
You download an addon, drag it into Blender, and nothing happens. Or you get a red error you have never seen before: a manifest error, a failed install, or an addon that simply does not show up. It happens with everything from small free tools to popular addons like Export Each, Scene State Bookmarks, or third-party libraries like BlenderKit, and it has become more common since Blender changed how addons are installed.
The fix does not need Python knowledge or digging through Blender's folders. I built a small free installer that adds an Addon Installer panel to your 3D Viewport. You pick the addon file, click one button, and it installs. It works on Blender 4.2, 5.0 and older versions, and handles both modern extensions and legacy addons.
Download the free Blender Add-on Installation Fixer (script plus a quick-start PDF guide).
If a Blender addon or extension will not install, download the free Addon Installer script, open it in Blender's Scripting tab and press Run Script. Then use the new Addons tab in the 3D Viewport sidebar (press N) to browse to your .zip or .py file and click Install Addon. It works on Blender 4.2, 5.0 and older versions.
Why Blender Addons Fail to Install
Blender 4.2 introduced the Extensions system, and that changed how installation works. The old Install button in Preferences was replaced by an Install from Disk option in a dropdown menu, and modern extension packages carry a manifest file that describes them. Older addons, now called legacy addons, still exist and follow the old structure. Mix the two up, or use a package that Blender does not expect, and you get errors that do not explain what went wrong.
These are the causes I see most often:
- Manifest errors. Blender expects an extension package to be built a certain way, and a legacy or badly packaged zip does not match.
- The wrong zip. Many downloads contain extra files, so you end up installing an outer zip that has the real addon zip inside it.
- Unsupported file types. A .rar or .7z file cannot be installed, and some addons ship as a single .py file instead of a zip.
- Version mismatch. An addon written for an older Blender may not load in a newer one because the Python API changed.
- Folder and permission problems. Blender may not be able to write to the folder it is trying to install into.
Blender rarely tells you which of these it is. You get an error and a suggestion to check the console, which is not much help when you are trying to work.
What the Addon Installer Does
The installer is a small Python script (about 7 KB). When you run it once, it registers a panel called Addon Installer in the Addons tab of the 3D Viewport sidebar. From there you browse to an addon file and click Install Addon. The panel also shows which installation method it is using, so you can see what happened.
| Price | Free ($0 on Gumroad) |
|---|---|
| Works on | Blender 4.2, 5.0 and older versions |
| Installs | .zip and .py addon files |
| Supports | Modern extensions and legacy addons |
| Where it appears | 3D Viewport sidebar (N), Addons tab, Addon Installer panel |
| Includes | Installer script and a quick-start PDF guide |
You do not have to edit any code and you do not have to understand Python. If you work with addons often, it is worth keeping around: it saves time every time a download refuses to install.
Step-by-Step: How to Install an Addon With the Installer
The whole process takes about three minutes the first time, and less after that. Follow these five steps in order.
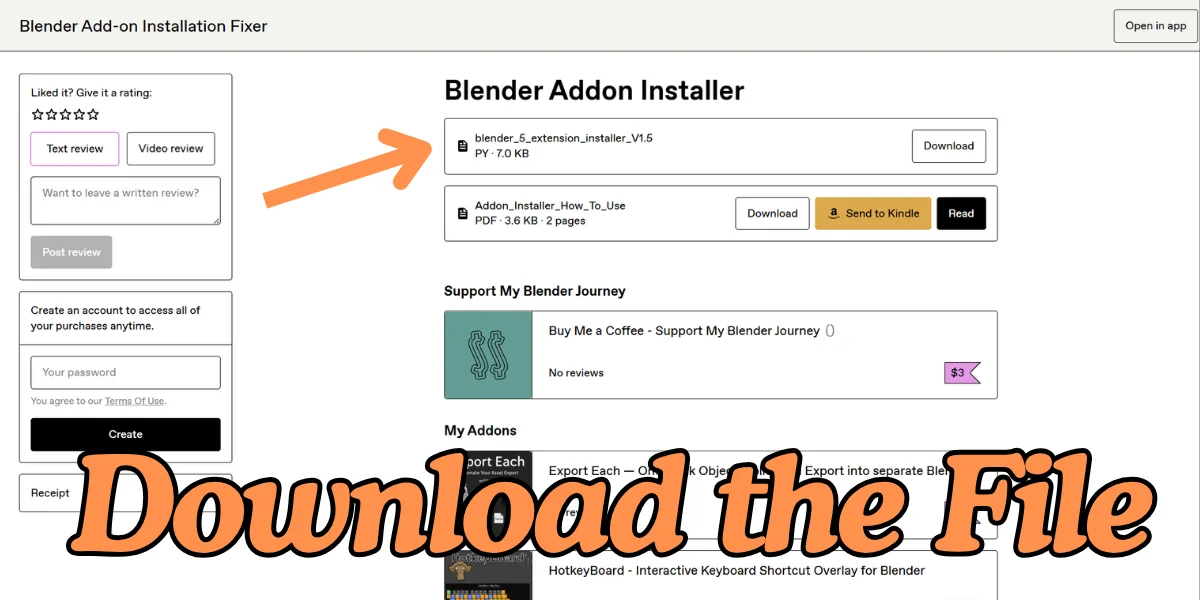
Step 1: Download the free installer script
Go to the Gumroad page and download the two files: the installer script (blender_5_extension_installer_V1.5.py, about 7 KB) and the quick-start PDF (Addon_Installer_How_To_Use). The price is $0, so you can take it for free.
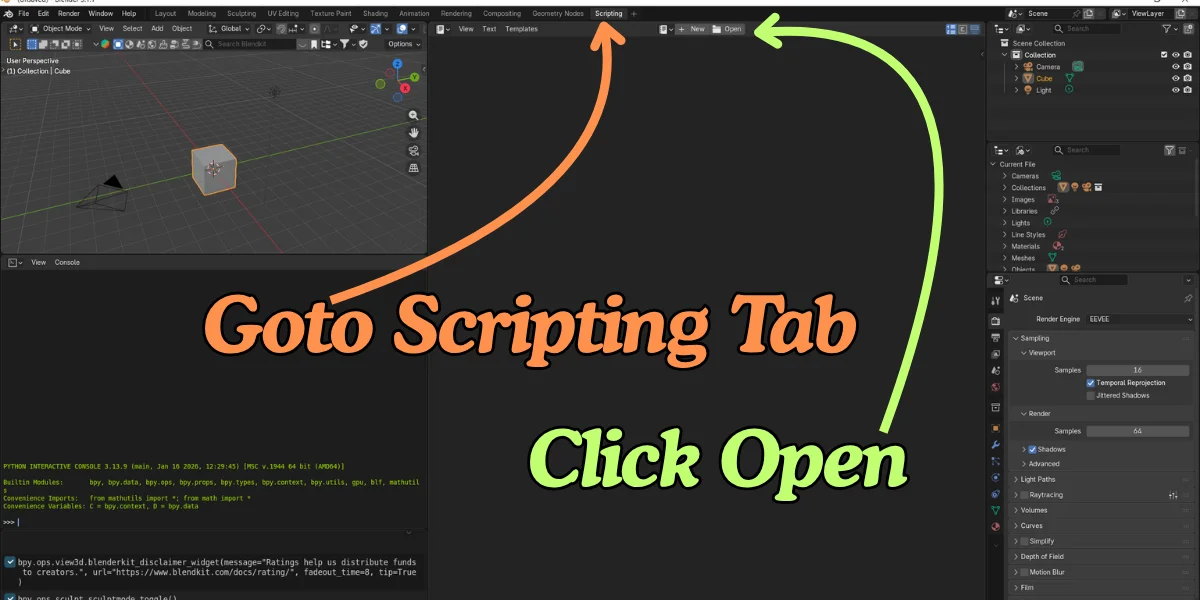
Step 2: Open the Scripting tab and click Open
In Blender, click the Scripting tab at the top of the window. In the text editor in the middle, click Open and choose the .py file you just downloaded. On older Blender versions you can click New instead and paste the script in.
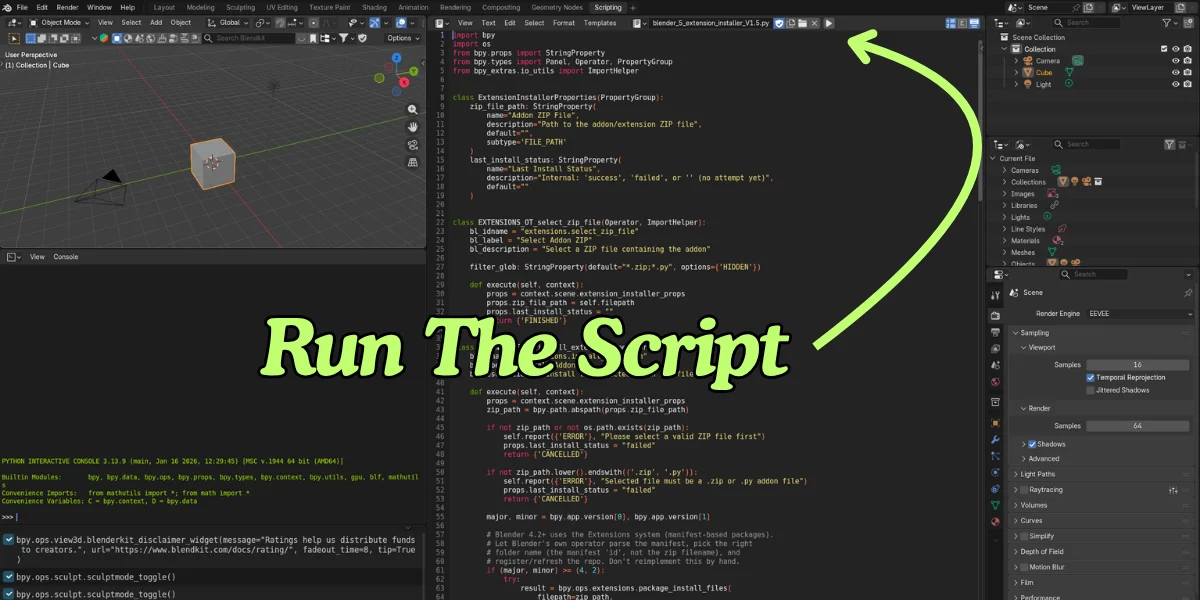
Step 3: Run the script
With the script showing in the editor, click the Run Script button (the play icon at the top of the editor). If it worked, the console prints "Addon Installer Panel registered successfully!".
Step 4: Find the panel and browse to your addon
Switch to any workspace with a 3D Viewport, such as Layout, and press N to open the sidebar (or use View, then Sidebar). Open the Addons tab and you will see the Addon Installer panel. Click Browse ZIP File and choose the addon .zip (or .py) you want to install.
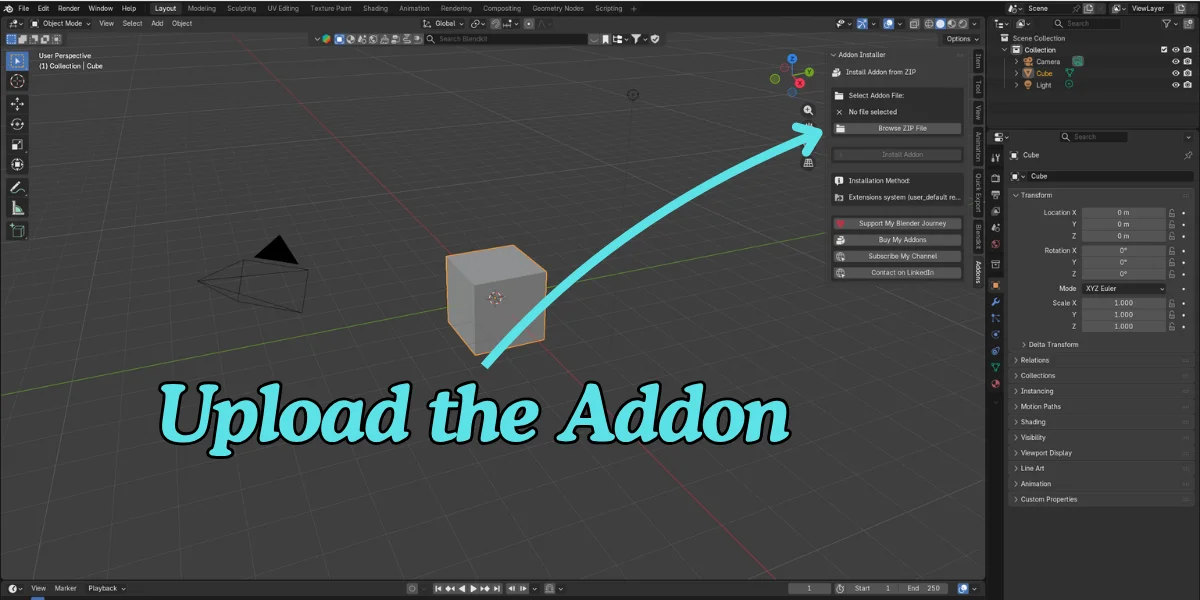
Step 5: Click Install Addon
The panel shows the file you selected and the Install Addon button becomes active. Click it. When it finishes you will see "It worked!" in the panel and a green success message in Blender's info bar. Errors show up in red, and the system console has the full details.
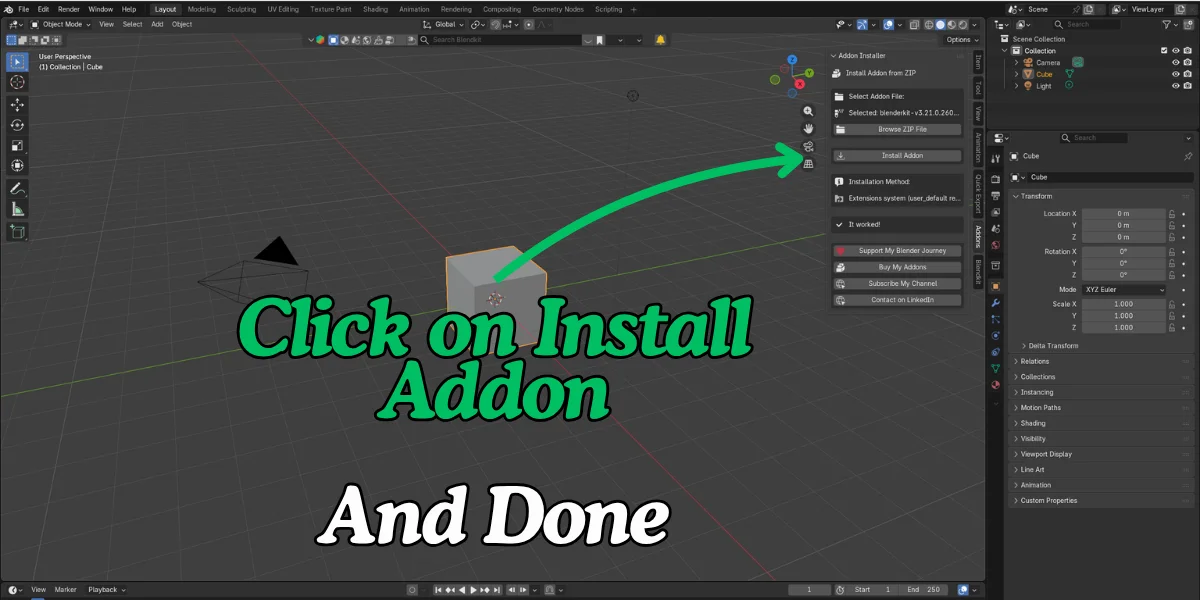
That is it. The addon is now installed. Open Preferences and enable it if it is not already switched on, and it is ready to use. The panel lasts for your current Blender session, so if it is gone after restarting Blender, open the script in the Scripting tab and run it again.
Ready to try it? Grab the free installer and the PDF guide.
Video Walkthrough
If you would rather watch than read, this short video shows the same fix from start to finish.
Still Not Working? Try This
The installer takes care of the installation step. If something still goes wrong, work through this list:
- Check you picked the right file. If the download contains several files, unzip it and choose the addon .zip (or .py) inside, not the outer package with documentation.
- Check the format. Convert .rar or .7z archives to a normal .zip first.
- Read the info bar and the console. Success shows in green in Blender's info bar, errors show in red, and the system console has the details.
- Check Blender compatibility. The installer cannot rewrite an addon's code. If an addon was built for a much older Blender, it may install but fail to run, so check its supported versions or changelog.
- Enable the addon. After a successful install, make sure it is switched on in Preferences.
- Ask for help. Send the console error to the addon author, or message me on LinkedIn from the Gumroad page.
A quick safety note: a script runs code inside Blender, so only run scripts, and only install addons, from creators and marketplaces you trust.
More Free Tools and Addons
If you like fixing problems fast, you may also want to try my other work. Browse all BeingAnimator Blender addons, check the free Blender tools, or see the Blender addons that solve common problems I recommend from other creators.
Frequently Asked Questions
Is the Blender Add-on Installation Fixer free?
Yes. It is listed on Gumroad at $0, so you can download it for free. You can also choose to pay a fair price to support the channel, but that is optional.
Does it work on Blender 5.0 and Blender 4.2?
Yes. The listing says it works on Blender 4.2, 5.0 and older versions, and it supports both modern extensions and legacy addons.
What kind of files can I install with it?
You can install .zip addon packages and .py addon files. Use the Browse ZIP File button in the Addon Installer panel to pick the file, then click Install Addon.
Where is the Addon Installer panel in Blender?
After you run the script, press N in the 3D Viewport to open the sidebar and click the Addons tab. The Addon Installer panel is inside that tab.
Do I need to know Python to use it?
No. You only open the script in the Scripting tab and press the Run Script button. You do not need to edit any code.
What if the addon still does not work after it installs?
The installer only handles the installation step. If an addon installs but fails to enable or run, check that it supports your Blender version, and check the system console for the error. Contact the addon author with that message if needed.
Is it safe to run a Python script in Blender?
Running any script lets it run code inside Blender, so only run scripts from sources you trust. Only install addons from trusted marketplaces or creators too.
Get the free Blender Add-on Installation Fixer and stop losing time to install errors.
Last updated September 22, 2026. Tested with Blender 4.2 and 5.0.
